The Rachel Mac Workout
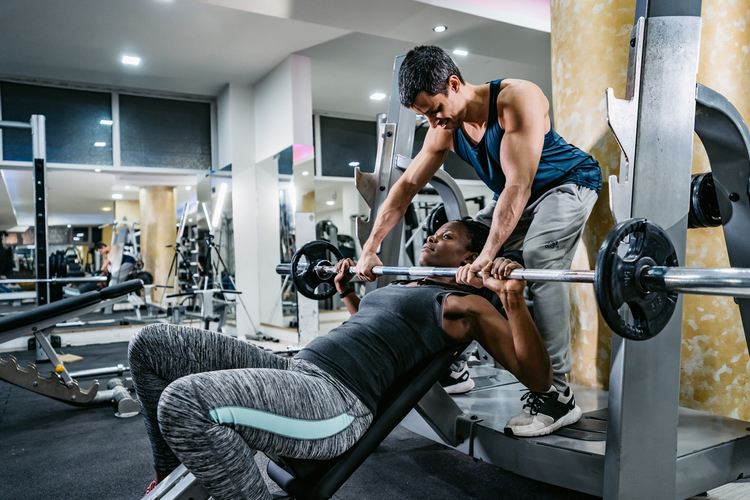
Editors Note: Rachel Mac is a commercial litigator in Chicago, Illinois, who lives a healthy lifestyle despite often spending 12+ hours per day in the office. She has come up with a low-maintenance healthy lifestyle that allows her to eat well and hit the gym regularly, with a schedule that’s anything but. Rachel is a regular contributor. Find Rachel on Facebook and on Twitter.
I’m going to start with a disclaimer–I am not a personal trainer, I’m just sharing a program that worked well for me. If you have any injuries or you’re just starting to work out, it’s much smarter (and cheaper) to consult with your doctor and a personal trainer (for at least a session or two) than to end up injured from lifting. And to the personal trainers out there reading this blog, if you see anything that looks off or incomplete, please comment below and let me know! I have no pride in authorship here because I know that I’m not an expert, and the exchange of information is what’s so great about blogging and sharing knowledge. Now, with that said …
I’ve been getting a lot of questions lately about my workouts, so what better idea than to put them up here? Although there are lots of ways to split up your strength training, I started out with what’s called a “four-day split”–that means you split up all your muscle groups into four days of strength training. One great thing about this plan is that it requires just four days a week in the gym (which most people can manage pretty easily), and you’ll lift each muscle group only once a week. That gives your muscles plenty of time to recover between workouts. But in exchange for that, you’re going to be lifting hard and heavy! My rule of thumb with lifting heavy is, if you can do ten reps in a set, it’s not heavy enough. With each set, you should use increasingly heavier weights, and keep trying to get to ten reps. By the last set, it’s OK if you can only do six or eight. These types of sets are called “add sets” or “pyramid sets.”
If you’ve read my Transformation Blogs, you’ll know that I switched from cardio to strength training to go from 24% body fat to 18% in about five weeks. I’m a firm believer that cardio is not absolutely necessary for long-term (and sustained) fat loss. But if you enjoy cardio, or have a lot of fat to lose, or want to accelerate your results, feel free to do cardio on this plan, but do it after you do your strength training, and you really don’t have to do more than 30 minutes on days you strength train. It’s never a bad idea to spend 5-10 minutes warming up on a cardio machine to get your blood pumping and loosen up your muscles. On legs day, this may be the only cardio you manage; that’s fine, your legs should be really wobbly when you’re done lifting!
I’ve included links to bodybuilding.com; they show the exercises so you can get an idea of your workout before you head to the gym. I recommend this; it means you’ll spend less time trying to figure out what you’re doing and more time burning calories and building muscle. And you’ll notice that the bodybuilding.com exercise demonstrations have a “female” tab at the top; I like this feature a lot, so check it out. Now, on to the exercises!
Day 1: Back and Biceps
Lift back first, because when you do, you use your biceps in many of the moves (once you’re conscious of this, you’ll notice it). By the time you’re done with your back, your biceps will be nearly fatigued; that’s why there are only a couple of exercises for biceps.
BACK:
- Lat pull downs (to the front of the chest): 3 sets
- Bent-over dumbbell row: 3 sets.
It’s important to keep your lower-back arched (trainers call this “neutral”), shoulders back and chest up. You can do this with a bar (as shown) or holding two dumbbells.
LOWER BACK (Pick one):
- Back extensions: 3 sets
Beginners can start with no weights, more advanced lifters can hold a plate across their chest. Don’t go too far past a straight angle when you come up, it shouldn’t feel like a backbend.
OR
- Supermans: Hold for 20-30 seconds for 3 sets.
Lie on your stomach on a mat, and lift your arms and legs. Keep your neck straight, so your eyes are pointing down at the mat.
BICEPS:
- Alternating bicep curl: 2 sets
- Barbell curl: 2 sets
- Hammer curl: 2 sets
Day 2: Chest and Triceps
Just like day 1, lift the big muscle group (chest) first, then finish off your triceps with a few sets at the end. Without going into too much detail, there are three main areas of your chest, this plan includes one exercise for each.
CHEST
- Chest press machine: 3 sets
- Incline chest press: 3 sets.
This works the upper chest, right below the shoulders.
- Cable cross overs: 3 sets
Start with hands high and then bring them together about waist level to work your lower chest.
TRICEPS:
- Bench dips: 2 sets.
If you’re feeling strong, you can put a weighted plate in your lap
- Seated triceps press: 2 sets
- Rope press downs: 2 sets
Day 3: Shoulders and Abs
It is very important to warm up your shoulders, as the joint is delicate and easily injured. I start with very light weights (2 lbs or so) in each hand, and do ten lateral raises (stand with your hands at your sides, weights in your hands, palms facing in, and extend your arms out straight to your sides), ten front raises (same as before, except you raise your straight arms, palms down, in front of you), and ten overhead presses (see link below). Repeat one more time.
SHOULDERS:
- Overhead dumbbell press: 3 sets.
You can do this one standing or seated (hold your abs tight the whole time to avoid bad posture while you have weights over your head
- Lateral raise: 3 sets.
Make sure to think about leading with your elbows on this one, not leading with your hands. This will get your shoulders in on the game and help build “shoulder caps” which are awesome.
- Rear dumbbell raise: 2 sets
- Standing upright rows: 3 sets
ABS:
There are obviously hundreds of exercises you can do for abs. If you want some variety, avoid anything that looks like a crunch. Here are some ideas — do three sets of each, pick 3-5 exercises.
- Plank:
Get into a push-up position on your toes and elbows (on a mat) and hold for 30 seconds (or longer if you can).
Day 4: Lower Body

Every other day, you should do cardio after you strength train, but on legs day it’s a good idea to get some light warm-up cardio out of the way because your legs will be trashed by the time you’re done!
- Squats: 3 sets.
To add a challenge, hold a dumbbell sideways between your hands at chest level. Be very conscious here to lead the movement by sticking your butt back, make sure your knees don’t go over your toes in front, and keep your shoulders back and chest up.
- Weighted Lunges: 3 sets
- Leg Press machine: 3 sets
Place your feet higher up and further apart on the platform to place more emphasis on your butt.
- Good mornings: 3 sets.
Keep your lower back arched, shoulders back, chest up.
OR
You can do this with a barbell as pictured or by holding two dumbbells. Lead by sticking your butt out, keep your lower back arched and shoulders back. Make sure you’re feeling the pull right below your butt and not in your lower back.
- Glute bridges: 3 sets
- Calf press on a leg press machine: 3 sets
It’s a good idea to track your strength training so you can make sure you’re pushing yourself; even if you just keep a notebook and write down the weights you use, that’ll help keep you on track and keep pushing yourself harder each week (Ed note: Gym Buddy is an awesome iPhone to track workouts). And remember, not every exercise works for every person. Scan the bodybuilding.com exercise archives and find lifts that are right for you. If you get bored, try mixing up some of the moves by doing them standing, seated, or on one leg (alternate halfway through, of course). Or, try some one-leg leg presses every once in a while (you’ll need to decrease the weight you use, of course, though you’ll find that you won’t have to decrease it by half). And most importantly, work hard and stick with it. When you build muscle, your body will get smaller, tighter, and more toned; you’ll look better in clothes and in a bathing suit or your underwear. You’ll stand taller, walk straighter, feel more confident. Switching from cardio to strength training was the best thing I’ve ever done for my body, appearance wise, and if you combine this with a healthy, clean diet, packed with protein and low on sugar (even natural sugar like fruit and dairy), you WILL see results.
Keep me posted on your progress via Facebook and Twitter! I can’t wait to see your progress.